SY Dog Star

A family sailing the Pacific

Category: Technical

Unravelling the thread – preparing for offshore sailing

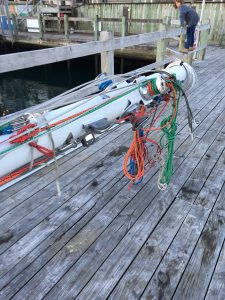
Sometimes pulling a thread on a piece of clothing is a bad idea, but perhaps on an offshore yacht it’s a good idea. A simple fuel bleeding recently led to a full haulout and weeks of work on Dog Star.

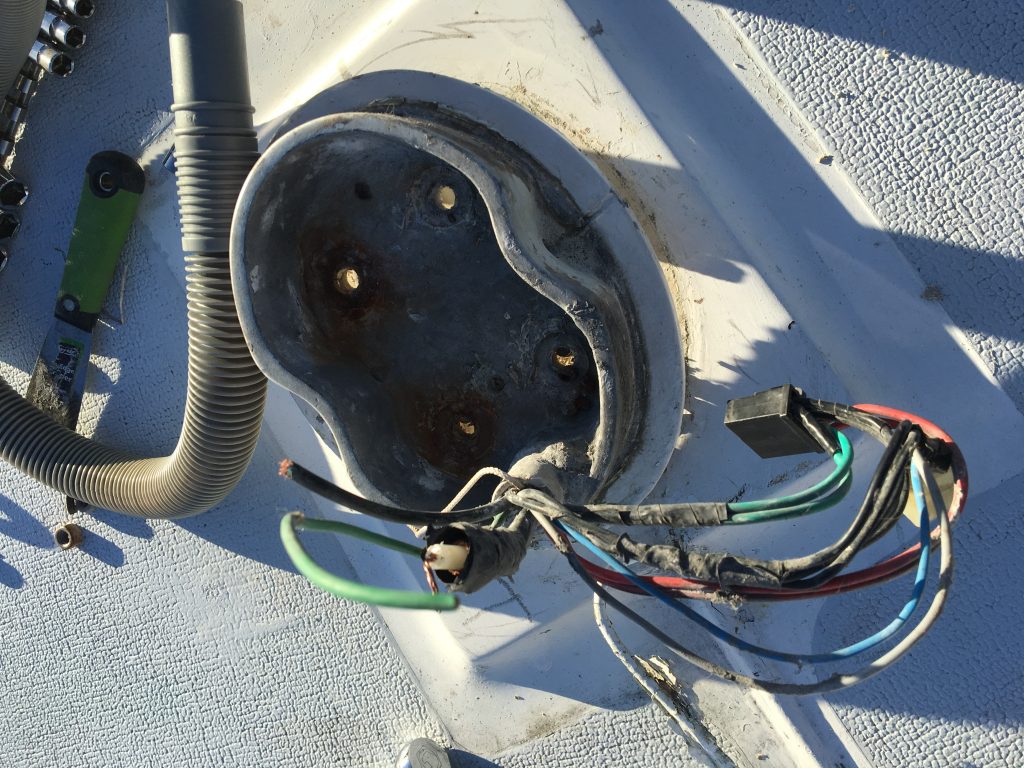
During the rigging refit I noticed that the engine was running rough as we motored to the fuel dock, just before we arrived the engine stopped! Thankfully we were only moving slowly and there was no wind, so after a quick prayer to Huey the engine spluttered into life and we finished the job. Later inspection found the fuel line’s hose clip had come loose on the secondary fuel pump. I tightened it up and began bleeding the engine. We had a bit of trouble and so asked our mechanic to show us around the engine and teach us how to properly bleed it.

“While you’re there mate, what do you think of the PSS seal?”

“I think it’s in a pretty bad state, I don’t want to freak you out, but you need to replace that immediately.”

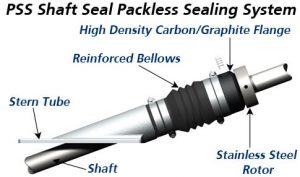
A PSS seal is a dripless shaft seal, it uses a carbon disc and a steel disc facing each other to create a seal, one face spins, the other is static. The very fine clearance between the discs creates a complete seal. Ours was a dripping dripless seal, which is what freaked out the mechanic.

Diagram of PSS Seal

Diagram of PSS Seal

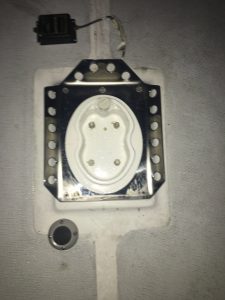
We hauled our Dog Star out and had Travis come checkout the boat and replace the shaft seal, we asked him to look at our faulty ShaftLok at the same time, the lock mechanism was totally worn out and never worked. In the process of pulling this off, our mechanic found more bad news. Someone had decided to try and “fix” the shaftlok by drilling a number of holes in the shaft….

…the horror…

Holes in the shaft

6 holes like this

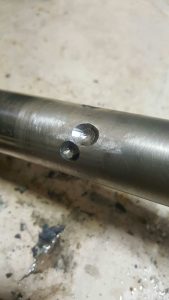
A 70hp motor pushing 12 tons of boat through the water generates a huge amount of twisting force, our 1.25 inch shaft was already at the lower end of the recommended size for our boat and engine combo. This meant a new shaft, which meant a hole drilled in the skeg to remove it. The worst thing about a sheared shaft would be the combination of water flooding into the engine compartment and no drive after plugging the leak.

The thread however, continued to unravel. In the process of removing the propellor I noticed it was very brittle and crumbly, years of poor maintenance meant that at some point there was probably no anode on the shaft, and the propellor acted as an anode in its place, electrolysis had stuffed it.

Now we await a new shaft and prop to arrive and be fitted, but the good news is, we are ditching the shaftlok and going for a Flexofold prop, which should mean silent and faster sailing when the motor isn’t running.

All in all, I see this as a good thing. Bit by bit we’re finding and fixing everything, I know once we’re 500 miles from anywhere, I’ll sleep better knowing this has all been found and sorted. There is more to the unravelling, but I’ll save that for the next post.

Rigging upgrade

The biggest job for us on Dog Star is to have the rig replaced, the single largest expense (other than buying a boat!). New Zealand registered ships must pass a safety inspection and be certified to Category 1. Part of this is having a rig in good order, a lot of people say a rig lasts 10 years, we have no idea how old Dog Star’s is, so it’s time to replace it. In particular, we wanted to do the following:

  • Replace standing rigging and running rigging
  • Fix the broken vang tang
  • Recondition the mast step
  • Brush, sand, prime and paint the mast and spreaders
  • Put a through-bolt through the mast and step (Cat 1 requirement)

Also, we need to replace the lifelines with the correct gauge of wire, 4mm for a boat of 12m, and replace the quick release shackles with pelican clips, again for Cat 1 compliance.

Alex up the mast getting ready for the crane

Lifting the mast out when it’s 15m tall requires a decent size crane.

Mast base is tricky to remove when the wires are Sikaflexed into place

Unfortunately when the mast was lifted the riggers had to cut the wires to free them from the mast base. This was partly because all the wires passed through a 25mm pipe in the mast step that was filled with Sikaflex. Removing the mast base to clean it up was quite difficult. it couldn’t be lifted more than about 2cm off the deck, so I had to spend about an hour digging out Sikaflex with a sail needle.

Once the mast base was off we took it home to paint it. A later step was to have the reefing lines, vang, outhaul, topping lift and main halyard led back to the cockpit, which meant 10 blocks which needed to be attached to padeyes through the deck. We decided that the less holes the better, so instead went for a base plate under the mast step to hold the blocks.

A stainless steel mast plate fabricated to site under the step.

Inside the boat the wiring was very difficult to trace, there were no easily accessible panels in the headliner, so I decided to remove small parts of it to gain access and route the wires up to the mast. In the picture above you’ll see a cable gland on the bottom left, this was part of a decision to have the wiring come out from the side of the mast, down a conduit into the deck. The reason for this was twofold, avoiding the nightmare of removing the mast step for the next person to take the mast out and to avoid any water ingress from inside the mast into the cabin top. Dog Star is a super dry boat, but the one spot I did find some water damage was in the headliner underneath the wiring from the mast.

Pulling apart the headliner

Pulling apart the headliner to find the wiring

A very useful tool for slowly removing the headliner.

The new wiring will be much easier for the next owner to service, by removing a small panel in the headliner, access to the joins in the wiring will be possible, meaning that they won’t need to cut wires when removing the mast.

New halyards and standing rigging

© 2024 SY Dog Star

Theme by Anders NorenUp ↑